1) First you must download the integration code from your Hosting Control Panel -> Reseller API -> Download WHMCS code.
2) Once you download it, place the HostBuddy.comnet.php code into \whmcs\modules\servers\HostBuddy.comnet\HostBuddy.comnet.php
3) Open HostBuddy.comnet.php and edit first 3 lines base on the information you find in your control panel -> Reseller Account -> Reseller Info.
4) Now login to your WHMCS admin interface and go to your Product/Service section and configure each of your hosting plan.

5) For each of your hosting plan, click on the 'EDIT' icon to edit it. In the edit section, go to Module Settings and you'll see 'HostBuddy.comnet' in your module list. Select 'HostBuddy.comnet'

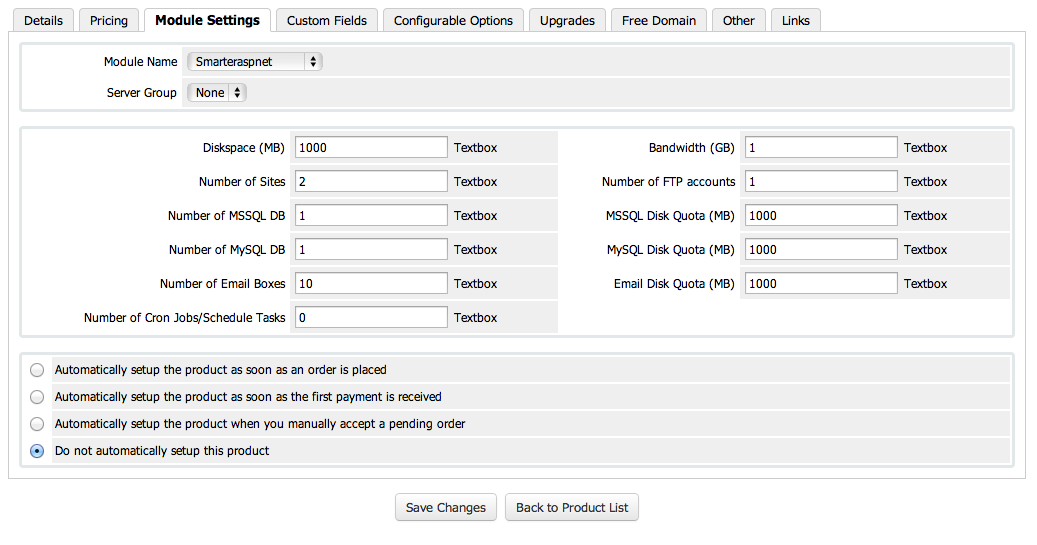
6) Once you select the module, you'll see the following appear. This is for you to preconfigure your hosting plan with certain configurations. Configure as you need and press save.
7) Now the configuration has been completed. You can pick a client and setup a hosting plan. Once you finish setting up a hosting plan for a client, go to the client's profile-> Product/Services and you'll see the following command. You can create, suspend, un-suspend, terminate and change password for the client's hosting account.

Article ID: 1647, Created: April 12, 2014 at 7:15 AM, Modified: April 12, 2014 at 7:15 AM